Setting Up the HealthyPi v4 Complete Kit
The HealthyPi v4 Complete Kit has all you need to quickly put together a standalone vital monitor. With the latest Raspberry Pi4 added with kit and microSD storage comes up with the HealthyPi v4 software pre-loaded and configured. Just Plug-in to stream live vital signs.
Everything is in the box
The SmartiPi Touch Display that comes included with the HealthyPi v4 Complete kit is already partly assembled. Now it’s time for you to take up the task by assembling the display enclosure and the display stand for the provided SmartiPi Touch Case. Check out the below video for instructions on how to assemble the kit.
Using HealthyPi v4 on Raspberry Pi
This section is for those who want to do a manual installation with HealthyPi v4, those who want to modify with the code and generally play with the hardware.
For the simple way to setup HealthyPi v4 on Raspberry Pi, The following are the steps involved to get Raspberry Pi ready for a wireless remote patient monitor. The following video shows you how to connect the HealthyPi v4 as “HAT” to a Raspberry Pi.
Step 1 : Install and Update the OS
Install Raspbian Buster with desktop and recommended software from the Raspberry Pi site.The image file can be downloaded from the Raspberry Pi’s official website.
Step 2 : Launching the HealthyPi application
Open up a new terminal window (Menu -> Accessories -> Terminal) on Raspbian running on your Raspberry Pi:
In the terminal window, type the following commands.
curl -sS https://healthypi.protocentral.com/install.sh | sudo bash
After the script reboots your Raspberry Pi, you should be able to see the GUI display the sensor outputs in real-time on the screen.
This completes the install!
Getting started with the HealthyPi GUI on Windows, MacOS and Linux
The HealthyPi v4 board now streams the same data on the on-board USB port. This allows you to get the same data that goes to the Raspberry Pi, now on your desktop PC as well.
Java 8 is required on all platforms for running the processing-based GUI application. You can download Java for your platform from the following link.
Installing drivers (only for Windows)
HealthyPi v4 uses the same drivers as an ESP32. Once plugged in to the USB port, the device would be recognized as an “Unknown Device”. You can locate the device is the Windows Device Manager and manually install the drivers provided in the “drivers” folder in the Windows Executable ZIP archive provided.
MacOS and Linux do not need any drivers to be installed.
Processing GUI Installation
The HealthyPi visualization software has been developed using the Processing. Processing is a Java-based open source framework. The following are the steps to get the visualization software ready for wireless remote patient monitor:
Step 1 : Download Processing IDE for your HOST COMPUTER operating system
a. Latest Version of the Processing IDE can be downloaded from the following link:
b. Unzip the file once downloaded.
c. Click for detailed Installation Instruction
Note:Verified with Processing v3.5.3
Step 2 : Getting the Processing code for the HealthyPi GUI
a. Download the HealthyPi v4 GUI Processing code from Protocentral Healthypi v4 Github repository.
b. Open the Processing and then File -> Open -> (downloaded path) -> protocentral_healthypi_v4 -> gui-software -> healthypi4_gui -> healthypi4_gui.pde opens the HealthyPi v4 processing code.
c. Intall its additional libraries from sketch-> import library-> add library like G4P, ControlP5, mqtt, Graphica.
Note: On MacOS, if you see an error saying “app is damaged”, please follow the steps given in https://support.apple.com/en-us/HT202491 .This is a known issue with Processing on MacOS.
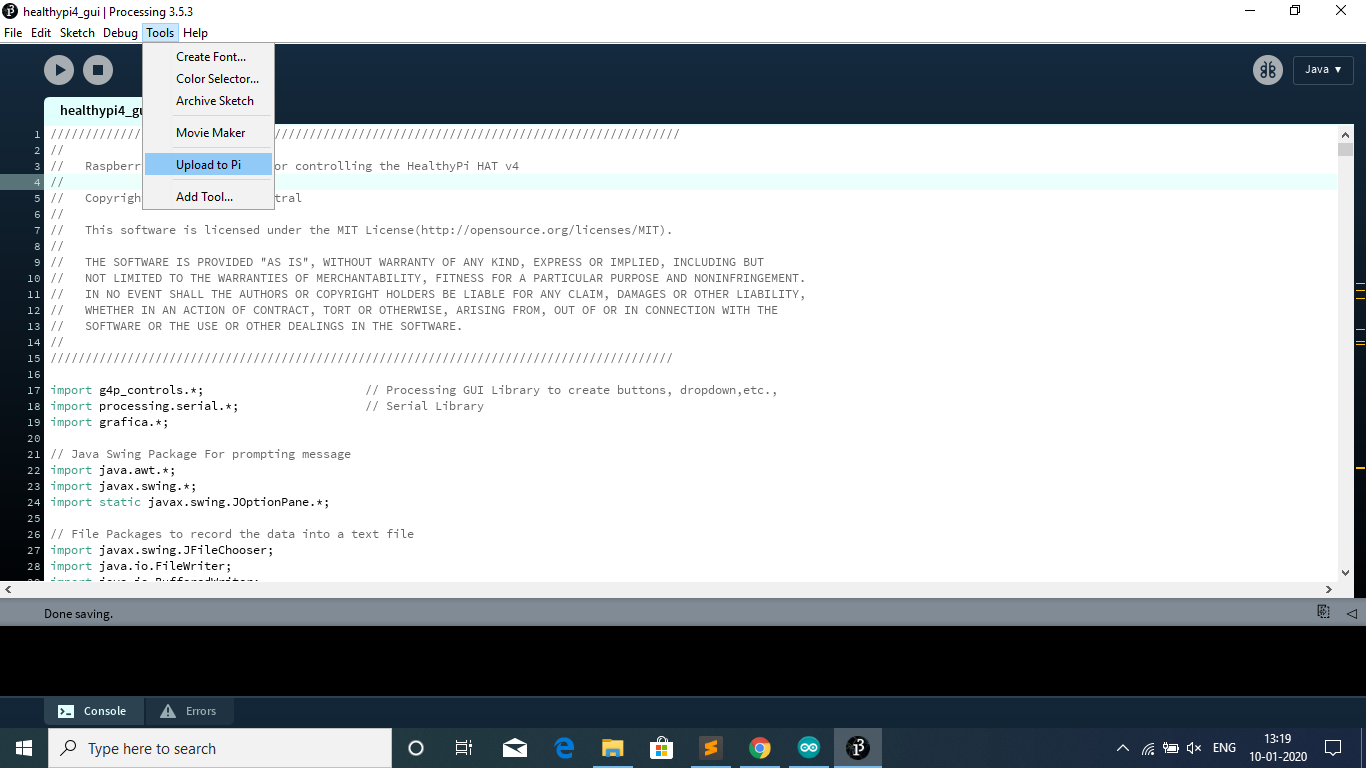
Step 3 : Upload the Processing code from PC to Raspberry Pi
1. In Processing IDE, Select “Tools” from the menu and choose, “Add tools”.
2. Select “Upload To Pi” tool and click Install button which is present in the button right corner as shown in the below image.
3. Now, connect your raspberry pi to the internet with the same network as your laptop is connected.
4. Select “Tools” menu and choose “Upload to Pi” option from the list.
5. If any error occured in uploading the code, check for the internet connection and repeat the process.